
Pickling Your Chillies
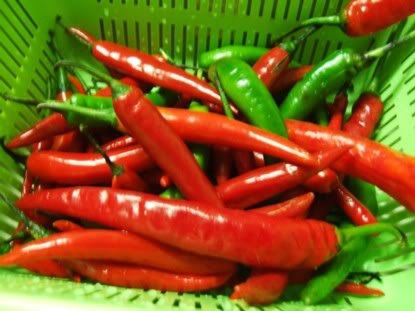
As with the other preserving techniques, make sure you wash your chillies and eliminate any bruised or seriously blemished fruit. They will only go mushy in the pickle and you won't want to use them. Also, if you are pickling for presentation, blemished chillies will really spoil the effect.
Stuff You Need To Remember
•Sterilise your jars in boiling water or an over set 110°C for approximately 10 minutes. Take care handling hot glass as it retains it's heat for quite a while.
•If you don't want to slice your chillies up, you will need to put a hole or slit in each of your chillies. This will allow the vinegar to get in and complete the pickling process. It also prevents the chillies from floating.
•Make sure you use pickling salt not table salt - they're not the same thing! If you can't find it, you're not looking hard enough - even many supermarkets carry it. Cooking shops, spice shops, continental stores, online ....
•If you are pickling for presentation purposes, use white vinegar as it does not affect the colour excessively. If you are pickling for yourself, i.e. maximum flavour, and not worried about colour, use cider or malt vinegar as they have a better flavour.
•Don't use caps/lids that will result in metal being exposed to the vinegar. The two will react and can cause toxins to be produced - it will also taste like crap.
•Air is a major spoiler of food. When pouring in the brine, leave little or no roomat the top of the jar. Caps should fit well to prevent air entering the jar.
•Once you've poured the pickling brine over the chillies, little bubbles that get stuck can usually be removed by tapping the side of the jar with the back edge of a knife.
•If the bubbles will not move, you can stick a knife blade into the mixture between the fruit and the glass to get rid of them. Put some effort into this as those bubbles contain bacteria that could spoil the batch.
A Few Recipes To Get You Started
Don't limit yourself to these two - use your imagination. Try adding other spices to the brine, layer the chillies by colour, put some vegetables in as well,
Basic Pickled Chillies
This recipe is for approximately 900g of chillies.
I soak the chillies overnight in the brine first as it keeps the chillies crisper when pickled.
Brine
•3 cups water
•1 cup pickling salt
Combine the salt and water. You don't want holes/slits in your chillies yet.
Cover the chillies with the brine in a bowl and put a plate or something similar over them to keep the chillies submerged. Soak the overnight then drain, rinse well, and dry.
Pickling Solution
•3 cups white vinegar
•3 cups water
•3 teaspns pickling salt
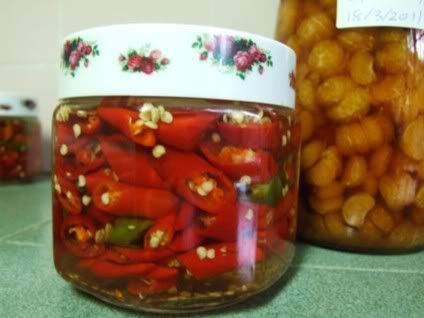
Poke two or three small holes in top of each chilli and pack them tightly in sterilized jars leaving 1cm (½ inch) at the top of the jar.
In a saucepan, combine the water, vinegar, and salt. Bring the solution to a boil and then pour over the chillies, leaving no space at the top. Remove trapped air bubbles.
Store for 4 to 6 weeks in a cool, dark place before serving.
Pickled Vege Garden
In this one I leave the amounts and particular ingredients up to you.
•Chillies, try and get some different colours in here
•Cauliflower and or broccoli, in florets
•Zucchini, unpeeled, thinly sliced
•Carrots, cut into rounds or use baby carrots
•Small, pickling onions, peeled and left whole
•Garlic cloves, whole
•Celery, cut into 3cm lengths
•1 part water
•1 part vinegar
•2 teasp pickling salt per litre of liquid
Arrange your choice of vegetables and chillies in sterilized jars.
Boil the water, vinegar and salt to a boil for about a minute. Pour over the vegetables, leaving no room at the top, and cover. Allow the mixture to pickle for at least 3 weeks in a cool, dark place before serving.
Chili Pickles- Quick and Easy
Essentially non-oil base, almost no cooking is required. Can be taken as complimentary to a dish, e.g. chili pickle to noodles, ginger pickle to sushi.
Can also be taken as an entree e.g. papaya pickle, ginger pickle, and most Chinese pickles.
The vinegar pickle base:
1 cup cider vinegar or Chinese rice vinegar
4 tbsp sugar (variable) 1/2 tsp. salt 1 tbsp lemon juice.
Warm the vinegar base, stir till sugar and salt dissolves. Add anything to be pickled.10 green chilies, 8 cm long, washed and dried thoroughly, diced circular.The most important procedure is the drying process. If not dried properly, the pickle will go bad very soon. Wash the stuff to be pickled, in this case, chilies, thoroughly. Pat dry or air dry thoroughly. This ensures that the pickle have a long shelf-live. Further refrigeration prolong it too.
Chili pickle
Add chili to the pickle base and mix well.
Let cool. Refrigerate for the pickle to remain crunchy even after 6 weeks. Pickled chili tastes less fiery due to the sweetening
effect of the sugar.
Besides chili, you can use the same vinegar pickle base to pickle onions, cucumber, zucchini, garlic, ginger, mango, cabbage, beet roots, carrot, etc.
Easy Chinese Pickled Chilli
The fish sauce obviously adds a different dimension to this however, the flavour is different from western pickles because of the rice vinegar which is less acidic and of milder flavour.
•1 kg (2.2 lb) sliced chillies
•1 cup rice wine vinegar
•3/4 cup white sugar
•6 teaspoons fish sauce
Place the vinegar and sugar in a saucepan, and stir over low heat, without boiling, until sugar is dissolved.
Then simmer, uncovered and without stirring, for about 5 minutes, or until mixture is slightly reduced. Remove from the heat, stir in fish sauce and then add the chillies. Store in a sealed jar in the fridge - it's ready to start eating after about 1 week and will keep for months.
CREDIT : http://www.chillies-down-under.com/pickling-chillies.html

No comments:
Post a Comment